Plug-In Hybrid Charging
AC Level 1 Charger - "Trickle Charge"
A Level 1 or “trickle” charger is the most common type of charging system for a Plug-In Hybrid. This type of charger uses 120 volts of household electricity and takes up to 10.5 hours for a full charge.
Trickle Charger Indicators:
 ICCB plug to a 120VAC outlet
 Power – When the charger and AC plug is plugged in and functioning normally, the indicator will turn green. Indicator is red if plug temperature sensor warning is present
 Charge – Indicates that the vehicle is charging
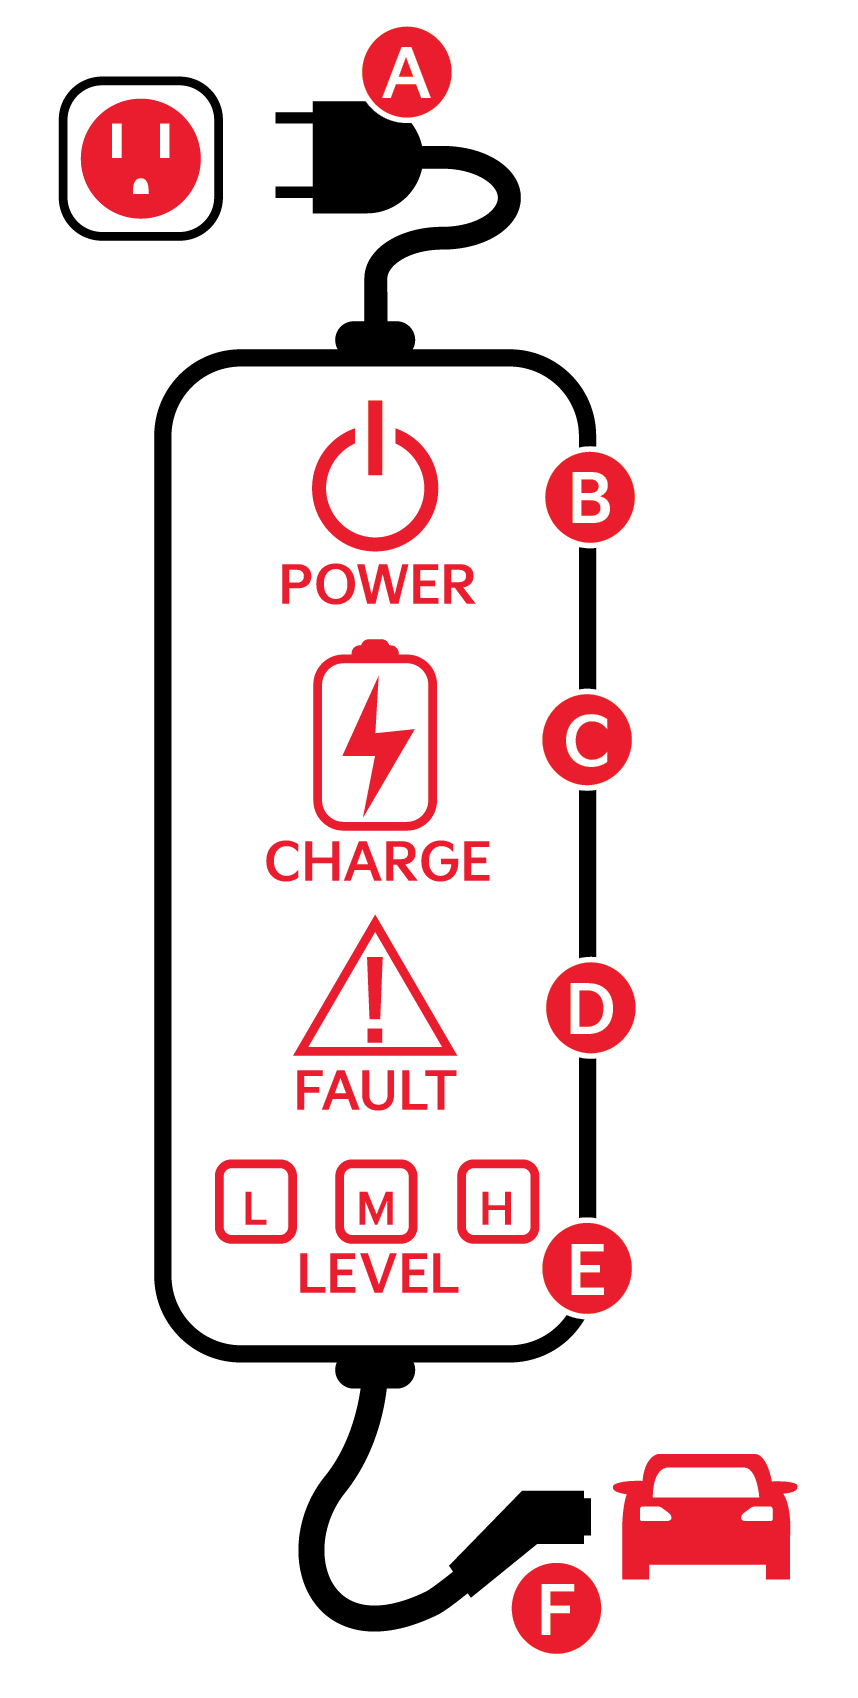
 Fault – Indicates charge failure
 Charge Level – Indicates the level of charge: L (8A), M (10A), or H (12A)
 ICCB – In-Cable Control Box
AC Level 2 Charger – “Normal” Charge
A Level 2 or “normal” 240-volt charger is the recommended charging system for the Plug-In Hybrid. This type of charger uses 240 volts of electricity and takes approximately 3.5+ hours for a full charge (Based on Kia testing with SAE J1772 charger performed at 3.3kW). This charger may be able to be installed at your home or found at a public charging station.
A Level 2 or “normal” 240-volt charger is recommended for regular charging of the vehicle.
To charge your Plug-In Hybrid vehicle using a Level 1 or 2 charger:
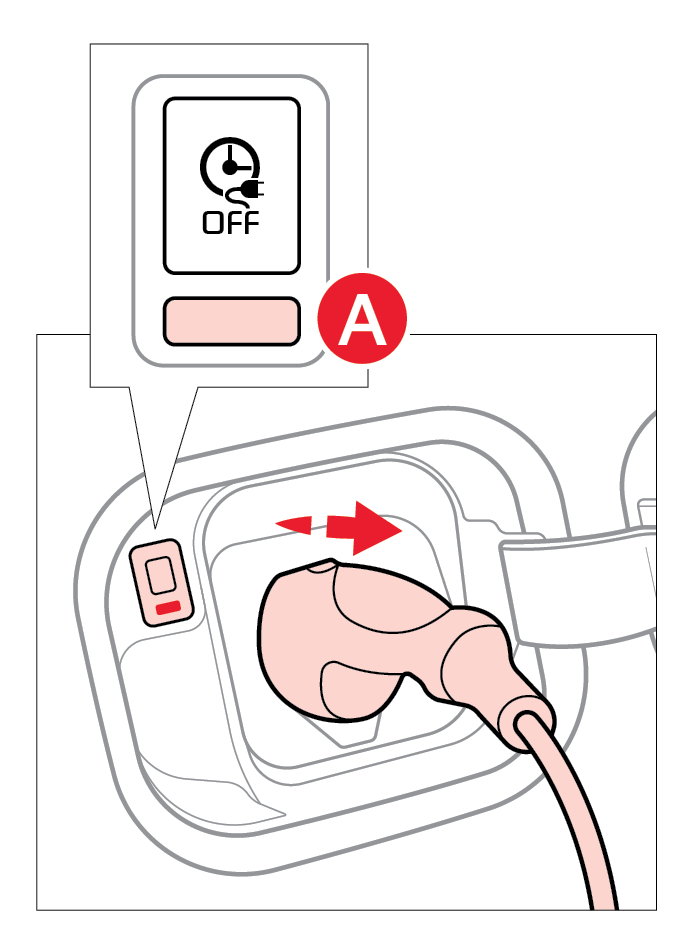
to an electrical outleton the ICCB turns on (green) 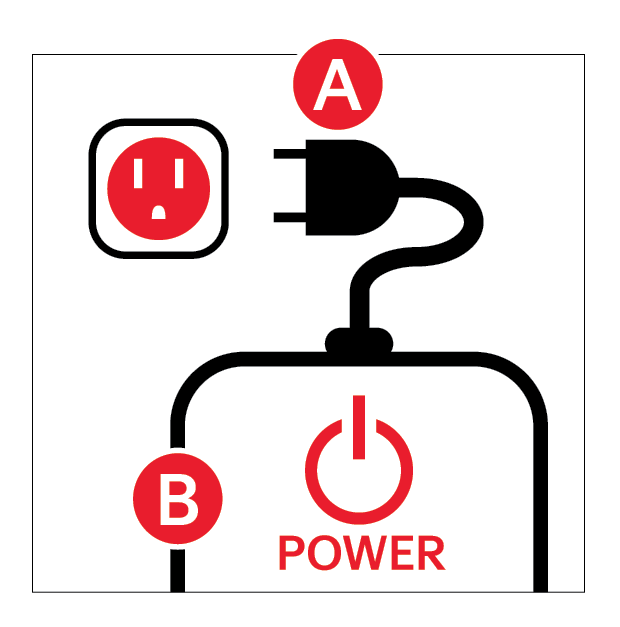 by pressing the rear center edge of the charging door (ensure doors are unlocked)
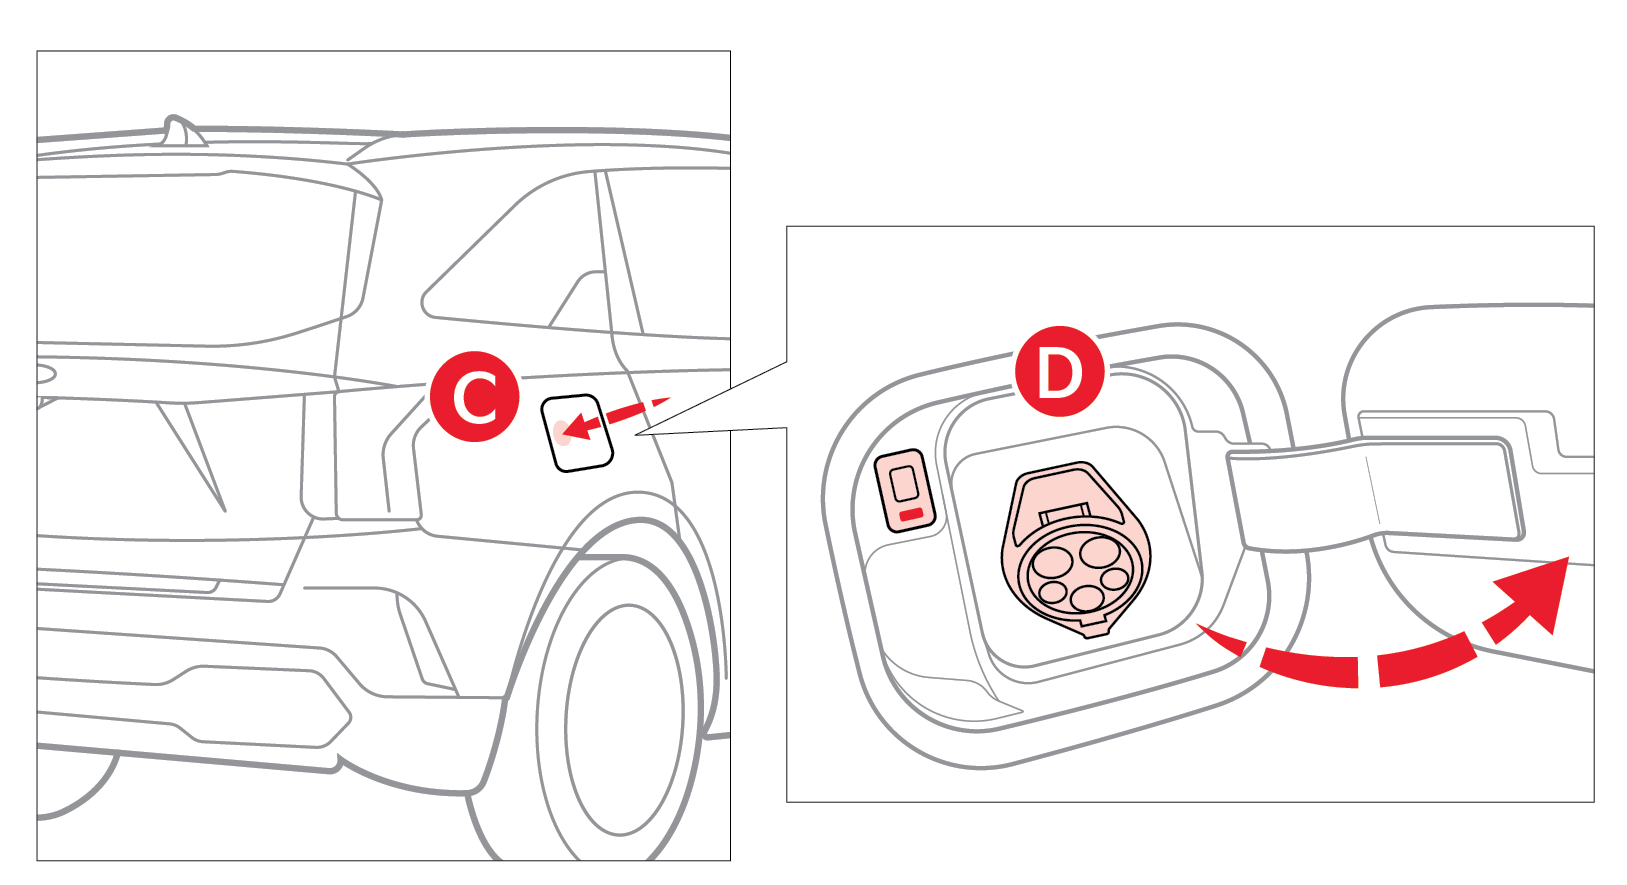
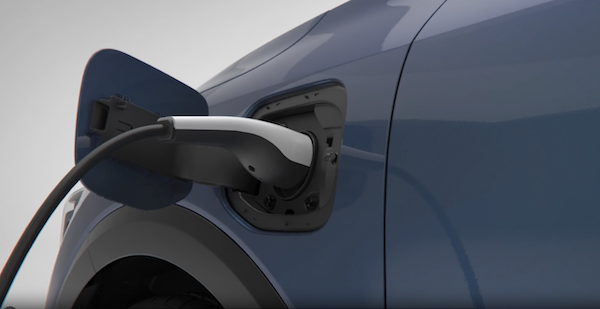
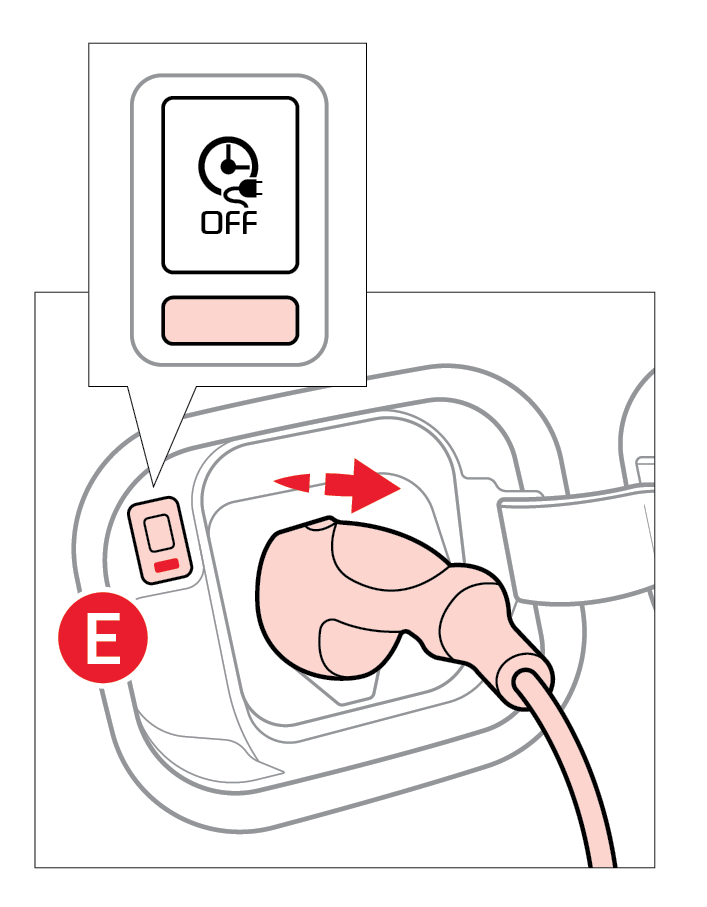 and connect it to the vehicle's charging inletby pushing the connector until you hear a clicking sound
 is illuminated on your Instrument Cluster, indicating the vehicle is charging)
Checking the Charging Status
The charging status can be checked by viewing the charging status indicatornear the charging inlet (bottom indicator). The charging indicator will blink yellow when charging, and the charge is from 0-65%. The charging indicator will blink green when charging and the charge is from 65-100%. The indicator will turn off within 5 seconds when charging is completed.
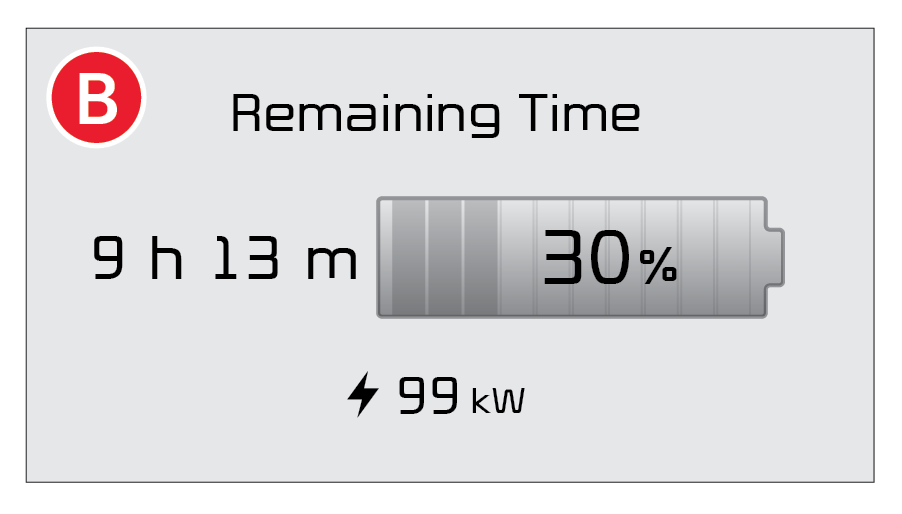
The remaining charging time will be displayed in the Instrument Clusterfor one minute, or when a driver’s door is opened during charging.
Removing the Charging Connector
To help prevent the risk of charging cable theft, the charging connector cannot be disconnected from the inlet when the doors are locked or the charging connector is in the LOCK mode. Unlock all doors to disconnect the charging connector from the inlet. If the release button does not work even after the all doors are unlocked, pull the emergency lift cable in the engine room.
For illustrative purposes only. Your actual display, buttons and/or features may vary.
For more information about energy flow, refer to section 1 of the Owner’s Manual.
Button configuration may vary. Images are for illustrative purposes only and may not reflect actual feature or operation.

